Mandy Boat Tee & Winter 10x10

Last week wrapped up another 10x10 wardrobe challenge (if you've never hear of this, read all about it here). In the fall I also participated in the 10x10 challenge and half of my items were me-mades. This time around I only included 3, one of which was my recently made Mandy Boat Tee!

This top is a free pattern by Tessuit Fabrics and I created this one out of a jersey bed sheet I found at the thrift store. As I continue to get more comfortable with sewing with knits, shopping second hand is a great option. And talk about secret pajamas...clothing made with bed sheets! ;)
I'll give you an overview of this piece then share my reflections on this year's winter 10x10.

The Pattern: Mandy Boat Tee by Tessuit Fabrics (free!)
The Fabric: Cotton jersey from second hand flat bed sheet
The Process: This pattern is 'one size fits all' and is meant to be a loose fitting comfortable top. To begin I washed my fabric on hot and dried (since this was someone's former bed sheet I wanted to make sure it was thoroughly disinfected). I then had to figure out which way the grain ran and cut the fabric to get it all straightened out. The sheet was cut quite crooked when the original maker created the sheet. Once I had the fabric on the square I was able to proceed.
For the finishes on the hems I used a double needle on my machine. This was my first time trying a double needle and I was surprised how easy it was to do!
Modifications: I followed the pattern with the exception of adding 2 inches to the sleeve length to make it full sleeves instead of 3/4 and I also took off 2 inches from the length to give more of a cropped fit.
Styling & Versatility: My wardrobe needed another basic 'mom' top for winter and this fit the bill! My days are spent chasing babies and I usually end up covered in dried snot by the end of the day. SO, comfy easy clothing is what I reach for on the regular. I love wearing blue, however this is slightly brighter than I normally gravitate toward. I do think it will mix well with my current wardrobe however. 
Overal Review: If you've been afraid to work with knits, definitely try this pattern! First of all, it's free, so that's a great reason to try it. But it's very forgiving since it's not fitted so there is little room for error. Keep a look out for jersey sheets when you hit the thrift store, then you will really have no excuse! I will be making more of these in the future for sure!

This winter marks the 4th time I've participated in the 10x10 challenge and each time I take away something new. 

The clothes I selected:
2 bottoms: one pair of high-waisted jeans, one pair of leggings
5 tops: one button up, one sweater, and 3 pullovers
2 outer pieces: one boiled wool kimono, one open cardigan
1 pair of leather ankle booties

What felt right:

  • I had no struggles coming up with outfits this round. Since I selected all separates, it was very easy to mix and match and not feel bored with what I was wearing. I loved pairing a few combos in new ways and I especially enjoyed utilizing my amazing Eileen Fisher boiled wool kimono that needed to have the spot light. It is really quite the team player. 
  • These leather booties were a recent purchase and I enjoyed the way they looked with each outfit. No regrets on only having 1 pair of shoes for 10 days!

What I would change next time:

  • First of all, I wasn't terribly happy with my color palette. I ended up feeling like I needed a few warmer colored pieces to throw in the mix. I tried to do this with earrings and a bandana, but I wanted something more camel colored (my signature color) in rotation by the end.
  • It's challenges like these that help me weed out pieces in my closet, and this time, that would be my jeans! I purchased these H&M Conscious jeans after having my son, thinking they would be a great way to pull in my postpartum tummy but I came to realize they just aren't quite high waisted enough. For me I need at minimum an 11 inch rise on my pants to truly feel satisfied in the height of the waist. Anything lower than that rubs me in a weird place where my abdominal muscles have separated after having 2 children.
  • Lastly, by the end I wished I had a piece or 2 with some length variation. Each top was relatively the same length and it left every outfit looking fairly similar in dimension. Next time I will add a long vest or skirt to change this up a little bit.

Ultimately my goal in participating in the 10x10 challenge is to have all pieces be me-mades (well...maybe not my shoes). I will slowly work toward this in the coming months and see if each time I can increase the number. There is also an amazing community of sweet women that participate through instagram, so follow the hashtags on there and you will be filled to the brim with inspiration!

Avocado Dyed Gathered Blouse

For the last several months I have been saving my avocado pits, waiting to have enough to naturally dye a large piece of fabric. We've been pretty cooped up due to the cold, so last week seemed like the perfect chance to try this new adventure!

  • To begin I boiled 15 avocado pits in my large pot for several minutes then simmered the pits for 2 full hours. Most tutorials say 30 minutes to an hour, but I was hoping to extract as much color as possible. The water turned to a beautiful red color.
  • Next I strained out the pits and little remnants and added alum in proportion to the amount of water (alum purchased through Amazon).
  • Once that was dissolved I soaked my fabric in warm water making sure it was thoroughly damp. This helps the color take more evenly. I used half of a 100% cotton sheet I recently found second hand. It is a very high-quality sheet with a high thread count.
  • I stirred the fabric in the dye bath and made sure it was completely covered. The canning accessory came in handy to weigh down the fabric and keep it submerged. I let the fabric sit overnight in the dye, stirring a few times before I went to bed. In the morning I wasn't satisfied with the color yet, so I heated up the pot and boiled the fabric for 30 minutes, stirring continuously. Originally I didn't want to boil the fabric in fear it might be damaging, but since it was a $2 sheet, I decided I wanted to try for a richer color. 
  • After boiling I allowed everything to cool, stirred several times, and let it sit another night. By mid-day the next afternoon, I then washed the fabric in my machine on cold and did 2 rinse cycles to follow. 

Following my dye experiment, I couldn't wait to turn the cotton into something wearable so this top happened shortly after!
The Pattern: Striped Linen Gathered Blouse Tutorial (free pattern!) by Fabrics Store
The Fabric: 100% cotton sheet, avocado dyed
The Process: After dyeing the fabric I simply cut out the pattern and followed the tutorial to create the blouse. I did 3 rows of gathering stitches and got the best gathers I've ever done!
Modifications: I made the smallest size and the shoulders and elbows were a little snug. So i let them out 1/4 of an inch into the 5/8 inch allowance and all was better!
Styling & Versatility: I haven't gravitated toward blush pinks or feminine gathers much lately. I've been drooling over clean lines and neutrals. But the natural shade of this pink is very appealing to me and the style of the tops seems to work well with it. I will wear this under sweaters, with a scarf, and hopefully enjoy it into the spring! It seems like a great top to wear around Easter when it's still cold, but you want those lighter colors.
Overal Review: For the pattern, I might suggest sizing up b/c of the slim fit of the arm, but overall it was a quick and painless make. The tutorial calls for linen but this heavier cotton worked very well. I am happy with the top and proud I branched out to try my hand at natural dyeing! I will deifintely be doing it again!

Holiday Kimono

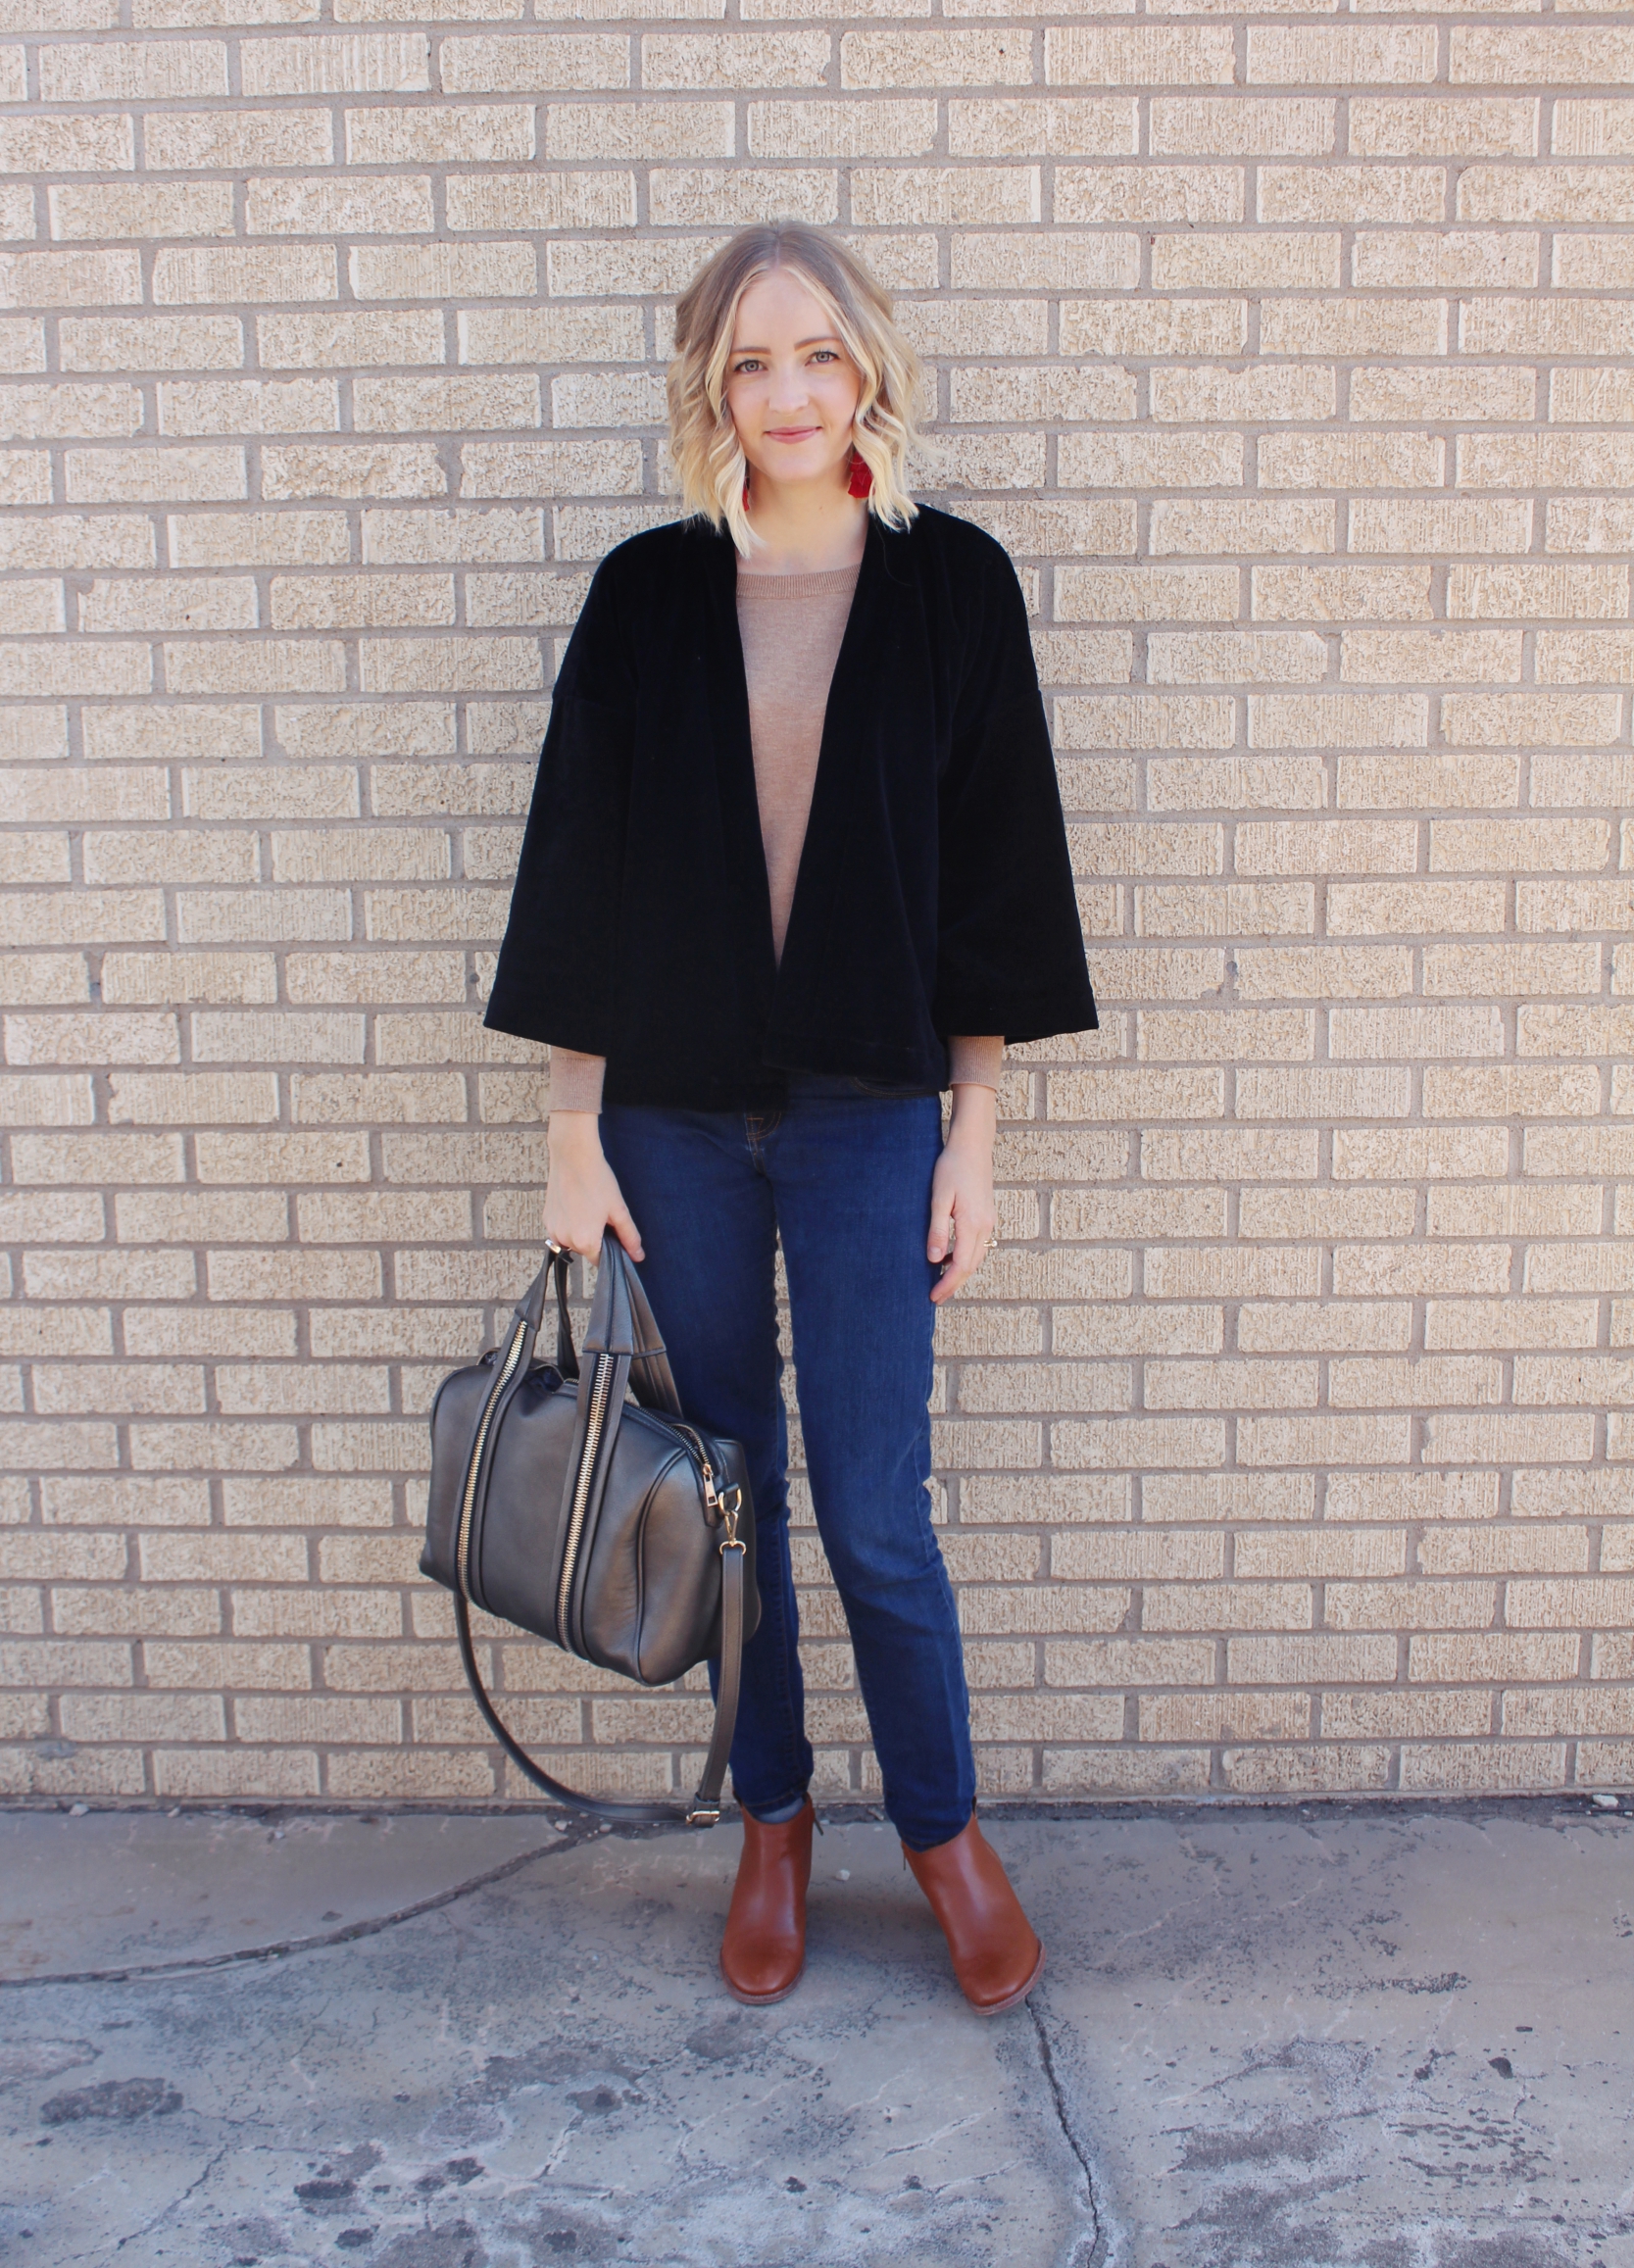
When I found this large second-hand Liz Claiborne velour dress I knew exactly what it was to become...a kimono. There was enough fabric to work with and with the holidays coming, why not!? Velour and velvets are easily dressed up, but being a stay-at-home-mom I wanted a more dressed-down way to enjoy this trend.

The Pattern: Kimono by Sew Over It London
The Fabric: Cotton/poly blend velour taken from a vintage Liz Claiborne dress
The Process: To begin I simply carefully cut apart the dress making sure to save as much fabric as possible. I laid out each piece then placed my pattern on top to ensure there was enough. I had JUST enough length from my largest pieces to create the back and 2 front panels. Then the bodice of the dress became the sleeves and neckband. I used my serger to put everything together and learned a lot about my serger settings a long the way (the girls from Sewing Outloud are amaaaaazing).
Modifications: I veered from the fabric recommendations on this pattern, but I think it turned out ok! I also had to piece together the neck band in 3 sections due to fabric restrictions (but the velour is forgiving b/c of the nap so you can't tell!) 
Styling & Versatility: To be honest, when I started making this I hadn't thought of how I'd wear it. So when it came time to put an outfit together I struggled a bit. But I think this kimono could work over a basic white t-shirt or even over a nicer dress for a holiday gathering. For these pictures I paired it with a simple camel colored sweater, jeans, and festive earrings for church. 
Overal Review: I can't believe I've never sewn with knits before this, particularly velour. It was dreamy to work with and such a breeze to make into a kimono when using an overlocker. I chose the Sew Over It pattern b/c it comes with a short and long version of the kimono so I can use it in future. I love boxy shapes and clean lines so this pattern is a winner for me!
I hope this piece gets worn a lot b/c I want each article in my closet to be a team player. But even so, it's fun to have a few holiday-ish items to mix in during December each year.

I have a few more things to sew up before Christmas arrives so stay tuned! I hope you each enjoy this wonderful (yet sometimes hectic) season! <3

Cocoon Dress

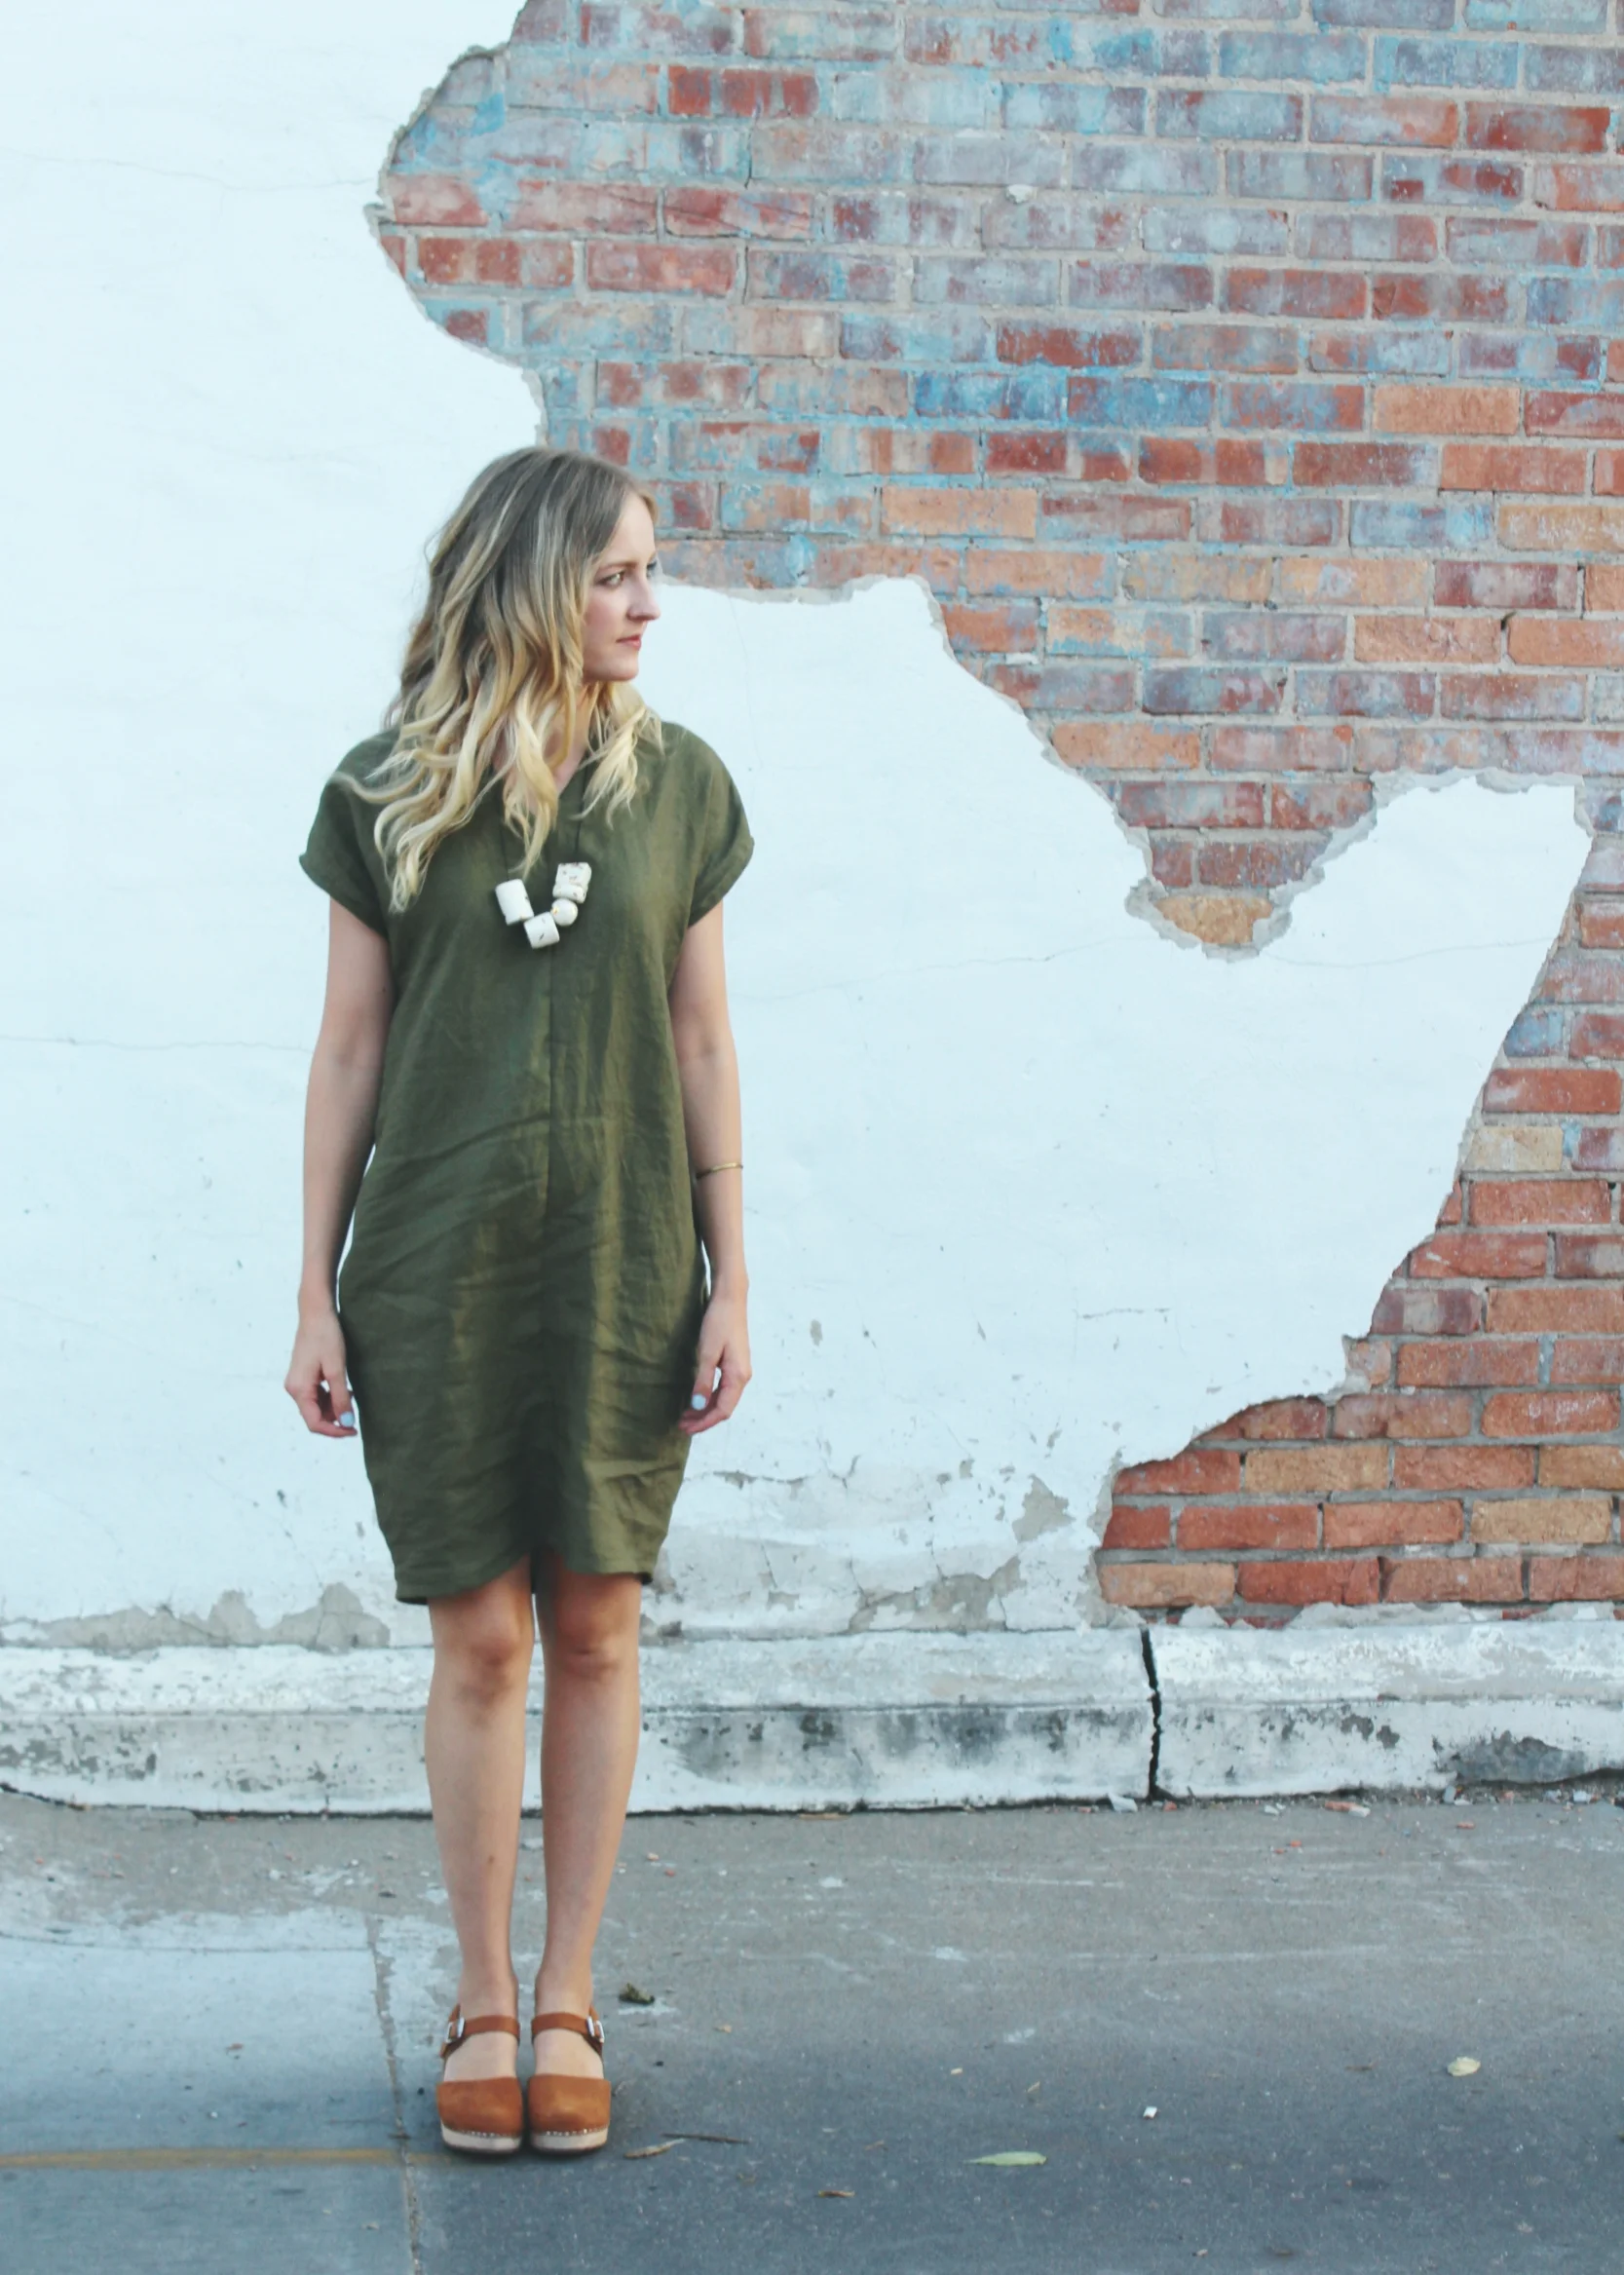
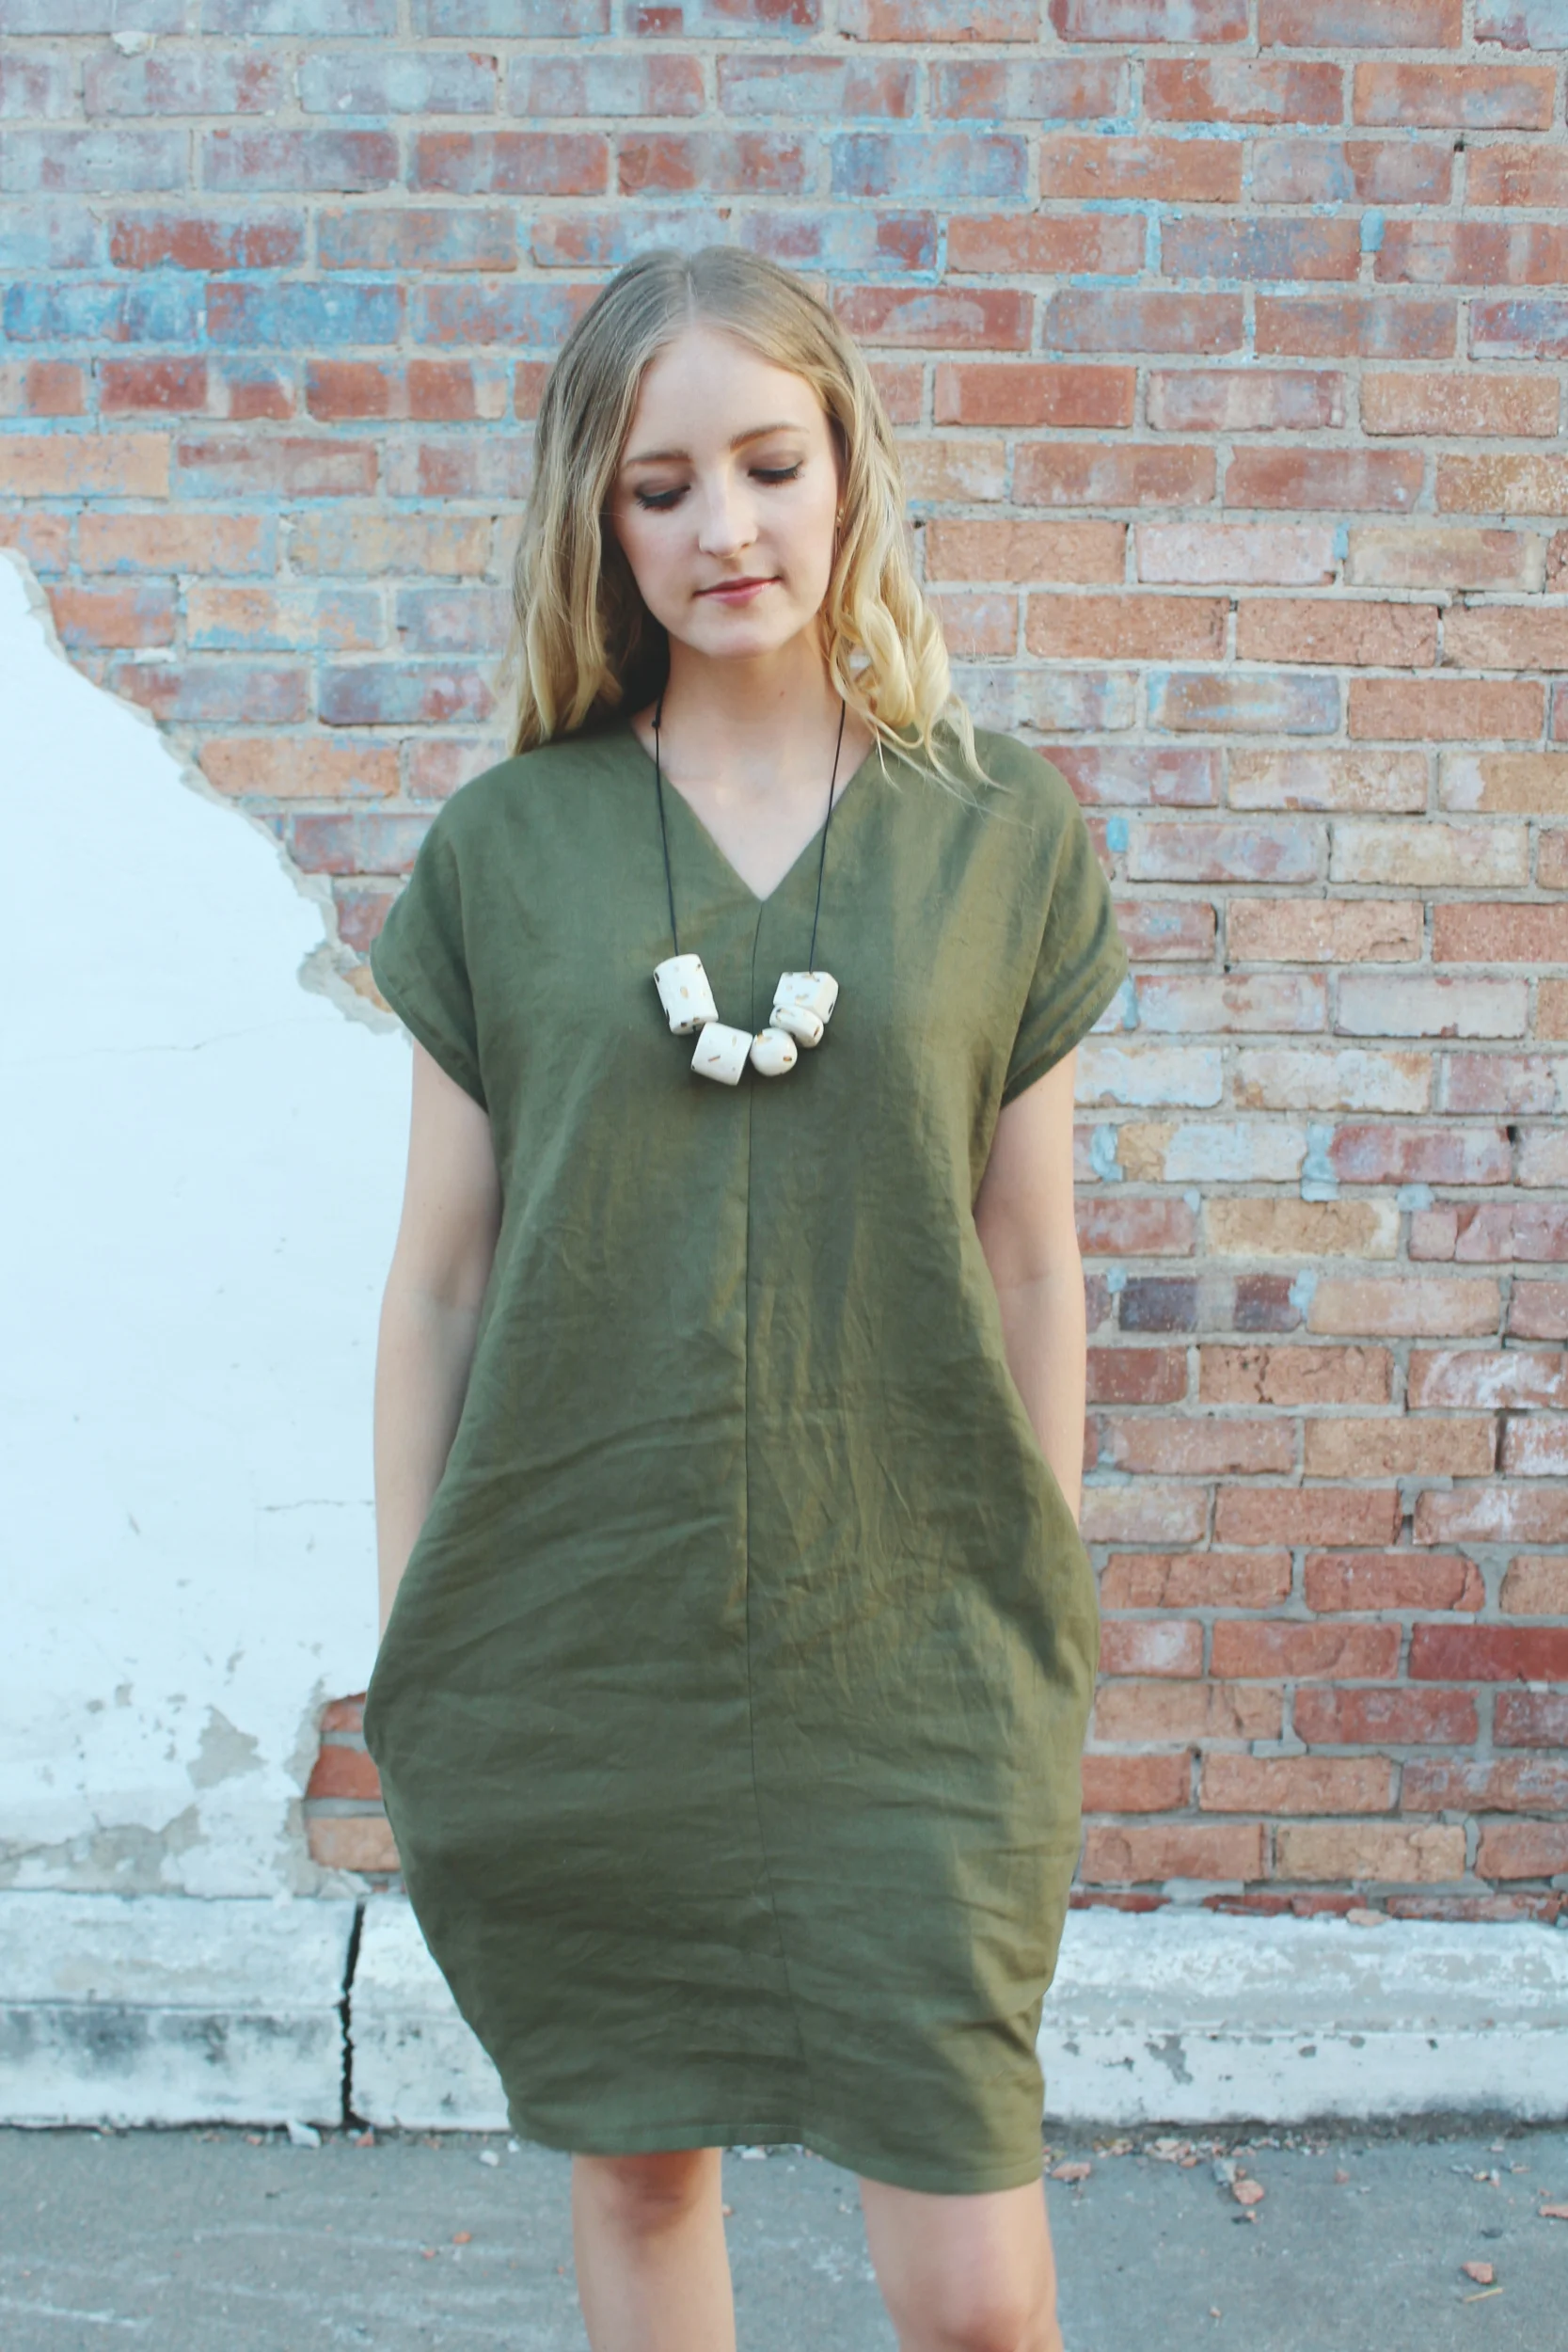
The Pattern: Cocoon Dress by Simple Sew
The Fabric: Linen in green for the dress (sourced second hand). Linen-blend in lime green for the pockets and facing (cut from a second hand dress).
Modifications: I didn't make any modifications to the shape or length of this dress, I did however use a few finishes they didn't call for.
After learning how to understitch with my Ogden Cami, I chose to understitch the facing and pockets. This was important because I used a different fabric for these areas and didn't want them to show. I'm hooked on understitching. It really adds a great finish that makes a garment feel higher quality and prevents small annoyances that lead to it being pushed to the back of the closet.
I chose to sew up the side seams and pocket bags all at once (they suggest doing it separately), and it turned out great.
I also overlocked the pockets, shoulder, side, and front seams before assembling. 
Styling & Versatility: The cocoon style is one I've been drawn to for a while but I hadn't found just the right pattern...until this one! I love the clean lines that make this piece one that can be styled up or down. The center front seam gives it just enough interest and the pockets are a mama-must-have. I can see myself wearing this in weekly rotation this fall with booties as the temps drop. Wouldn't a long linen jacket look great over this too? 
(My necklace is by my friend at Soil Stone Co.)
Overal Review: I LOVE this pattern and already have another dress in the works! The pattern has a sleeve option that I can't wait to try with some linen I purchased at Fancy Tiger Crafts. I highly recommend this pattern (although be warned it doesn't come in a pdf and it has to ship from overseas). It's a great one for a beginner because of its simplicity. There are no buttons or zippers.
Lately I've been hooked on very simple aesthetics, clean lines, and ease of wear. This fits the bill in every way.